OpenAI Codex CLI
Lightweight coding agent that runs in your terminal
npm i -g @openai/codex
> [!NOTE]
> This README focuses on the native Rust CLI. For additional deep dives, see the [docs/](../docs) folder and the [root README](https://github.com/openai/codex/blob/main/README.md).
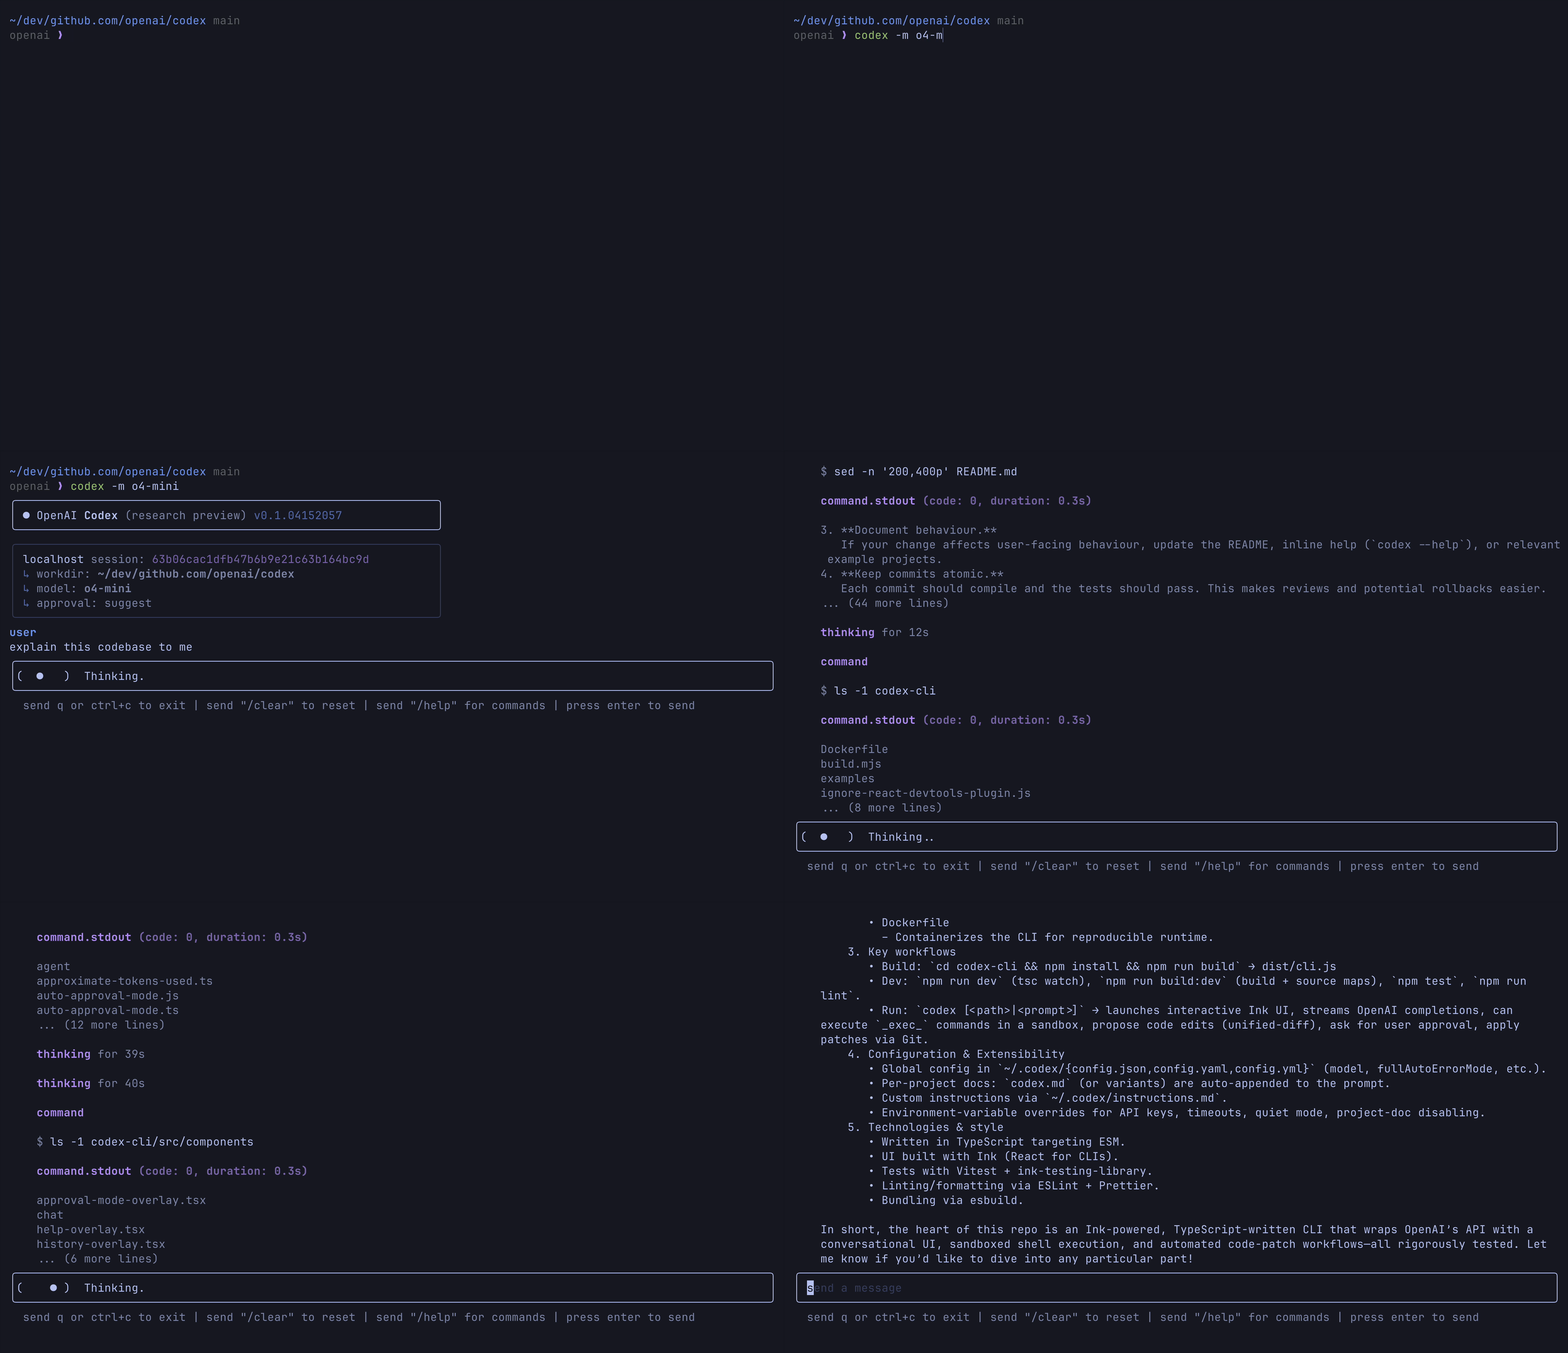
---
Table of contents
- [Experimental technology disclaimer](#experimental-technology-disclaimer)
- [Quickstart](#quickstart)
- [Why Codex?](#why-codex)
- [Security model & permissions](#security-model--permissions)
- [Platform sandboxing details](#platform-sandboxing-details)
- [System requirements](#system-requirements)
- [CLI reference](#cli-reference)
- [Memory & project docs](#memory--project-docs)
- [Non-interactive / CI mode](#non-interactive--ci-mode)
- [Tracing / verbose logging](#tracing--verbose-logging)
- [Recipes](#recipes)
- [Installation](#installation)
- [Configuration guide](#configuration-guide)
- [Basic configuration parameters](#basic-configuration-parameters)
- [Custom AI provider configuration](#custom-ai-provider-configuration)
- [History configuration](#history-configuration)
- [Configuration examples](#configuration-examples)
- [Full configuration example](#full-configuration-example)
- [Custom instructions](#custom-instructions)
- [Environment variables setup](#environment-variables-setup)
- [FAQ](#faq)
- [Zero data retention (ZDR) usage](#zero-data-retention-zdr-usage)
- [Codex open source fund](#codex-open-source-fund)
- [Contributing](#contributing)
- [Development workflow](#development-workflow)
- [Git hooks with Husky](#git-hooks-with-husky)
- [Debugging](#debugging)
- [Writing high-impact code changes](#writing-high-impact-code-changes)
- [Opening a pull request](#opening-a-pull-request)
- [Review process](#review-process)
- [Community values](#community-values)
- [Getting help](#getting-help)
- [Contributor license agreement (CLA)](#contributor-license-agreement-cla)
- [Quick fixes](#quick-fixes)
- [Releasing `codex`](#releasing-codex)
- [Alternative build options](#alternative-build-options)
- [Nix flake development](#nix-flake-development)
- [Security & responsible AI](#security--responsible-ai)
- [License](#license)
---
## Experimental technology disclaimer
Codex CLI is an experimental project under active development. It is not yet stable, may contain bugs, incomplete features, or undergo breaking changes. We're building it in the open with the community and welcome:
- Bug reports
- Feature requests
- Pull requests
- Good vibes
Help us improve by filing issues or submitting PRs (see the section below for how to contribute)!
## Quickstart
Install globally:
```shell
npm install -g @openai/codex
```
Next, set your OpenAI API key as an environment variable:
```shell
export OPENAI_API_KEY="your-api-key-here"
```
> **Note:** This command sets the key only for your current terminal session. You can add the `export` line to your shell's configuration file (e.g., `~/.zshrc`) but we recommend setting for the session. **Tip:** You can also place your API key into a `.env` file at the root of your project:
>
> ```env
> OPENAI_API_KEY=your-api-key-here
> ```
>
> The CLI will automatically load variables from `.env` (via `dotenv/config`).
> [!TIP]
> The CLI ships with OpenAI and local OSS providers out of the box. To add additional providers, edit the `[model_providers]` table in `~/.codex/config.toml`. See [Configuration guide](#configuration-guide) for examples.
Run interactively:
```shell
codex
```
Or, run with a prompt as input (and optionally in `Full Auto` mode):
```shell
codex "explain this codebase to me"
```
```shell
codex --full-auto "create the fanciest todo-list app"
```
That's it - Codex will scaffold a file, run it inside a sandbox, install any
missing dependencies, and show you the live result. Approve the changes and
they'll be committed to your working directory.
---
## Why Codex?
Codex CLI is built for developers who already **live in the terminal** and want
ChatGPT-level reasoning **plus** the power to actually run code, manipulate
files, and iterate - all under version control. In short, it's _chat-driven
development_ that understands and executes your repo.
- **Zero setup** - bring your OpenAI API key and it just works!
- **Full auto-approval, while safe + secure** by running network-disabled and directory-sandboxed
- **Multimodal** - pass in screenshots or diagrams to implement features ✨
And it's **fully open-source** so you can see and contribute to how it develops!
---
## Security model & permissions
Codex lets you decide _how much autonomy_ the agent receives via the
`--ask-for-approval` flag (or the interactive onboarding prompt). The default is `on-request`.
| Mode (`--ask-for-approval …`) | Auto-approves | Escalates to you when… |
| ----------------------------- | ---------------------------------------------------------------------------------------------------------------------------------------------- | ------------------------------------------------------------------------------------------------------ |
| `untrusted` | Built-in "safe" commands that only read files (`ls`, `cat`, `sed`, etc.) | The model proposes writing to disk or running any other command. |
| `on-failure` | All commands, executed inside the configured sandbox with network access disabled and writes limited to the allowed directories. | A command fails in the sandbox and the model wants to retry it without sandboxing. |
| `on-request` _(default)_ | Whatever the model deems safe; it typically asks you before launching riskier commands or writing files. | The model decides it wants confirmation, or the sandbox refuses a command and the model asks to retry. |
| `never` | Everything, with no escalation. | Never; failures are returned straight to the model. |
Use `codex --full-auto` as a shorthand for `--ask-for-approval on-failure --sandbox workspace-write`. For air-gapped or CI environments that provide their own isolation, `--dangerously-bypass-approvals-and-sandbox` disables both confirmation prompts and sandboxing—double-check before using it.
### Platform sandboxing details
The hardening mechanism Codex uses depends on your OS:
- **macOS 12+** - commands are wrapped with **Apple Seatbelt** (`sandbox-exec`).
- Everything is placed in a read-only jail except for a small set of
writable roots (`$PWD`, `$TMPDIR`, `~/.codex`, etc.).
- Outbound network is _fully blocked_ by default – even if a child process
tries to `curl` somewhere it will fail.
- **Linux** - commands run through the bundled `codex-linux-sandbox` helper. It combines **Landlock** filesystem rules with a **seccomp** filter, mirroring the macOS policy: commands start network-disabled and only the working directory (plus a few temp paths) are writable. You still get escape hatches via the `--sandbox` flag:
- `--sandbox read-only` is ideal for review-only sessions.
- `--sandbox danger-full-access` turns the sandbox off. Pair it with `--ask-for-approval untrusted` if you still want Codex to double-check risky commands.
Containers (Docker/Podman) can still be useful when you want completely reproducible toolchains, GPU access, or custom OS packages. In that case launch the CLI inside your container and keep the built-in sandbox on; it will happily sandbox _inside_ the container.
---
## System requirements
| Requirement | Details |
| --------------------------- | ----------------------------------------------------------------------- |
| Operating systems | macOS 12+, Ubuntu 22.04+/Debian 12+, or Windows 11 via WSL2 |
| Runtime dependencies | None for the packaged binaries (install via npm, Homebrew, or releases) |
| Git (optional, recommended) | 2.39+ for built-in PR helpers |
| RAM | 4-GB minimum (8-GB recommended) |
> Never run `sudo npm install -g`; fix npm or use another package manager instead.
---
## CLI reference
| Command | Purpose | Example |
| ------------------------------------ | --------------------------------------------------- | ---------------------------------------------------- |
| `codex` | Launch the interactive TUI | `codex` |
| `codex "..."` | Seed the interactive session with an opening task | `codex "fix lint errors"` |
| `codex exec "..."` | Run a non-interactive turn in the current repo | `codex exec "count the total number of TODO comments"` |
| `codex exec --json "..."` | Stream machine-readable events as JSON Lines | `codex exec --json --full-auto "update CHANGELOG"` |
| `codex exec resume --last "..."` | Resume the most recent non-interactive session | `codex exec resume --last "ship the follow-up fix"` |
| `codex completion ` | Print shell completion script for your shell | `codex completion bash` |
Helpful flags: `--model/-m`, `--ask-for-approval/-a`, `--sandbox/-s`, `--oss`, `--full-auto`, `--config/-c key=value`, and `--web-search`.
---
## Memory & project docs
You can give Codex extra instructions and guidance using `AGENTS.md` files. Codex looks for `AGENTS.md` files in the following places, and merges them top-down:
1. `~/.codex/AGENTS.md` - personal global guidance
2. `AGENTS.md` at repo root - shared project notes
3. `AGENTS.md` in the current working directory - sub-folder/feature specifics
---
## Non-interactive / CI mode
Run Codex head-less in pipelines. Example GitHub Action step:
```yaml
- name: Update changelog via Codex
run: |
npm install -g @openai/codex
export OPENAI_API_KEY="${{ secrets.OPENAI_KEY }}"
codex exec --json --full-auto "update CHANGELOG for next release" > codex.log
```
`codex exec` streams its progress to stderr and writes the final assistant reply to stdout. Use `--json` when you need structured output, or `-o path/to/result.json` to capture just the closing message.
## Tracing / verbose logging
Set `RUST_LOG` to control structured logging. The default filter is `codex_core=info,codex_tui=info,codex_rmcp_client=info`. To turn on verbose logs for troubleshooting:
```shell
RUST_LOG=codex_core=debug,codex_tui=debug codex
```
Logs are written to `~/.codex/logs/codex-tui.log` in addition to stderr. You can use standard `env_logger` syntax (e.g., `RUST_LOG=info,reqwest=trace`).
---
## Recipes
Below are a few bite-size examples you can copy-paste. Replace the text in quotes with your own task. See the [prompting guide](https://github.com/openai/codex/blob/main/codex-cli/examples/prompting_guide.md) for more tips and usage patterns.
| ✨ | What you type | What happens |
| --- | ------------------------------------------------------------------------------- | -------------------------------------------------------------------------- |
| 1 | `codex "Refactor the Dashboard component to React Hooks"` | Codex rewrites the class component, runs `npm test`, and shows the diff. |
| 2 | `codex "Generate SQL migrations for adding a users table"` | Infers your ORM, creates migration files, and runs them in a sandboxed DB. |
| 3 | `codex "Write unit tests for utils/date.ts"` | Generates tests, executes them, and iterates until they pass. |
| 4 | `codex "Bulk-rename *.jpeg -> *.jpg with git mv"` | Safely renames files and updates imports/usages. |
| 5 | `codex "Explain what this regex does: ^(?=.*[A-Z]).{8,}$"` | Outputs a step-by-step human explanation. |
| 6 | `codex "Carefully review this repo, and propose 3 high impact well-scoped PRs"` | Suggests impactful PRs in the current codebase. |
| 7 | `codex "Look for vulnerabilities and create a security review report"` | Finds and explains security bugs. |
---
## Installation
From npm (Recommended)
```bash
npm install -g @openai/codex
# or
yarn global add @openai/codex
# or
bun install -g @openai/codex
# or
pnpm add -g @openai/codex
```
Build from source
```bash
# Clone the repository and navigate to the workspace root
git clone https://github.com/openai/codex.git
cd codex
# Ensure you have the latest stable Rust toolchain
rustup default stable
# (Optional) install just for handy automation
cargo install just
# Build the interactive CLI
cargo build -p codex-tui
# Run it directly from source
cargo run -p codex-tui -- --help
```
---
## Configuration guide
Codex reads configuration from `~/.codex/config.toml` (or `$CODEX_HOME/config.toml`). TOML is the only supported format. Command-line flags (`--model`, `--ask-for-approval`, `--config key=value`, etc.) override whatever is set in the file.
### Basic configuration parameters
| Key | Type | Default | Description |
| ------------------ | -------- | -------------------------------------------- | ------------------------------------------------------------------------------------------------- |
| `model` | string | `gpt-5-codex` (macOS/Linux) / `gpt-5` (WSL) | Selects the default model. |
| `model_provider` | string | `openai` | Picks an entry from the `[model_providers]` table. |
| `approval_policy` | string | `on-request` | Matches the CLI `--ask-for-approval` flag (`untrusted`, `on-failure`, `on-request`, `never`). |
| `sandbox_mode` | string | `workspace-write` on trusted repos, otherwise read-only | Controls how shell commands are sandboxed (`read-only`, `workspace-write`, `danger-full-access`). |
| `notify` | array | _unset_ | Optional notifier command: e.g. `notify = ["terminal-notifier", "-message", "Codex done"]`. |
| `tui_notifications`| table | `{"approvals": true, "turns": true}` | Controls OSC 9 terminal notifications. |
| `history.persistence` | string | `save-all` | `save-all`, `commands-only`, or `none`. |
| `hide_agent_reasoning` | bool | `false` | Suppress reasoning summaries in the UI. |
Use `codex --config key=value` to experiment without editing the file. For example, `codex --config approval_policy="untrusted"`.
### Managing model providers
The CLI bundles two providers: `openai` (Responses API) and `oss` (local models via Ollama). You can add more by extending the `model_providers` map. Entries do **not** replace the defaults; they are merged in.
```toml
model = "gpt-4o"
model_provider = "openai-chat"
[model_providers.openai-chat]
name = "OpenAI (Chat Completions)"
base_url = "https://api.openai.com/v1"
wire_api = "chat"
env_key = "OPENAI_API_KEY"
[model_providers.ollama]
name = "Ollama"
base_url = "http://localhost:11434/v1"
```
Set API keys by exporting the environment variable referenced by each provider (`env_key`). If you need to override headers or query parameters, add `http_headers`, `env_http_headers`, or `query_params` within the provider block. See [`docs/config.md`](../docs/config.md#model_providers) for more examples, including Azure and custom retries.
### History, profiles, and overrides
- History is controlled via the `[history]` table. Example:
```toml
[history]
persistence = "commands-only"
redact_patterns = ["api_key=*"]
```
- Use profiles to store alternative defaults:
```toml
[profiles.ops]
model = "gpt-5"
approval_policy = "untrusted"
sandbox_mode = "read-only"
```
Launch with `codex --profile ops`.
- Override individual keys for a single run: `codex --config history.persistence="none"`.
### MCP servers and instructions
Add MCP integrations with `[mcp_servers.]` blocks (stdio or streamable HTTP). Refer to [`docs/config.md#mcps`](../docs/config.md#mcp-integration) for the schema.
For persistent guidance, create `AGENTS.md` files in `~/.codex`, your repo root, or subdirectories. Codex merges them from root to current directory before each turn.
### Example `config.toml`
```toml
model = "gpt-5-codex"
model_provider = "openai"
approval_policy = "untrusted"
sandbox_mode = "workspace-write"
[history]
persistence = "save-all"
[model_providers.azure]
name = "Azure"
base_url = "https://YOUR_RESOURCE_NAME.openai.azure.com/openai"
env_key = "AZURE_OPENAI_API_KEY"
wire_api = "responses"
query_params = { api-version = "2025-04-01-preview" }
```
Restart Codex (or run the next command with `--config`) after editing the file to pick up changes.
---
## FAQ
OpenAI released a model called Codex in 2021 - is this related?
In 2021, OpenAI released Codex, an AI system designed to generate code from natural language prompts. That original Codex model was deprecated as of March 2023 and is separate from the CLI tool.
Which models are supported?
Any model available via the [Responses API](https://platform.openai.com/docs/api-reference/responses). The default is `gpt-5-codex` (or `gpt-5` on Windows/WSL), but pass `--model` or set `model = "gpt-4.1"` in `config.toml` to override.
Why does o3 or o4-mini not work for me?
It's possible that your [API account needs to be verified](https://help.openai.com/en/articles/10910291-api-organization-verification) in order to start streaming responses and seeing chain of thought summaries from the API. If you're still running into issues, please let us know!
How do I stop Codex from editing my files?
Run with `codex --ask-for-approval untrusted` or `codex --sandbox read-only` to force Codex to ask before making changes. In interactive sessions, you can also deny a specific command or patch by answering **n** when prompted.
Does it work on Windows?
Not natively. Use [Windows Subsystem for Linux (WSL2)](https://learn.microsoft.com/en-us/windows/wsl/install) and install the Linux build inside your WSL environment. We regularly test on macOS and Linux.
---
## Zero data retention (ZDR) usage
Codex CLI **does** support OpenAI organizations with [Zero Data Retention (ZDR)](https://platform.openai.com/docs/guides/your-data#zero-data-retention) enabled. If your OpenAI organization has Zero Data Retention enabled and you still encounter errors such as:
```
OpenAI rejected the request. Error details: Status: 400, Code: unsupported_parameter, Type: invalid_request_error, Message: 400 Previous response cannot be used for this organization due to Zero Data Retention.
```
You may need to upgrade to a more recent version with: `npm i -g @openai/codex@latest`
---
## Codex open source fund
We're excited to launch a **$1 million initiative** supporting open source projects that use Codex CLI and other OpenAI models.
- Grants are awarded up to **$25,000** API credits.
- Applications are reviewed **on a rolling basis**.
**Interested? [Apply here](https://openai.com/form/codex-open-source-fund/).**
---
## Contributing
This project is under active development and we currently prioritize external contributions that address bugs or security issues. If you are proposing a new feature or behavior change, please open an issue first and get confirmation from the team before investing significant effort.
We care deeply about reliability and long-term maintainability, so the bar for merging code is intentionally **high**. Use this README together with the canonical [contributor guide](../docs/contributing.md).
### Development workflow
- Create a topic branch from `main` (for example `feat/improve-sandbox`).
- Keep changes focused; unrelated fixes should land as separate PRs.
- Install Rust 1.80+ and `just`. Most commands run from the repo root:
- `just fmt` formats all Rust code.
- `just fix -p codex-tui` runs `cargo clippy --fix` and `cargo fmt` for the TUI crate (swap the crate name as appropriate).
- `cargo test -p codex-tui` or other crate-specific test commands keep feedback fast.
- If you touch shared crates (for example `codex-core` or `codex-common`), prefer `cargo test --all-features` after the targeted suite passes.
### Debugging
- Run `cargo run -p codex-tui --` to launch the CLI under your debugger of choice. `cargo run -p codex-cli --bin codex-linux-sandbox -- --help` is helpful when iterating on the sandbox helper.
- Set `RUST_LOG=codex_core=debug,codex_tui=debug` to capture verbose logs (see [Tracing](#tracing--verbose-logging)).
- Use `cargo test -p -- --nocapture` to see println!/tracing output from tests while iterating on new features.
### Writing high-impact code changes
1. **Start with an issue.** Open a new one or comment on an existing discussion so we can agree on the solution before code is written.
2. **Add or update tests.** Every new feature or bug-fix should come with test coverage that fails before your change and passes afterwards. 100% coverage is not required, but aim for meaningful assertions.
3. **Document behaviour.** If your change affects user-facing behaviour, update the README, inline help (`codex --help`), or relevant example projects.
4. **Keep commits atomic.** Each commit should compile and the tests should pass. This makes reviews and potential rollbacks easier.
### Opening a pull request
- Fill in the PR template (or include similar information) – **What? Why? How?**
- Run **all** checks locally (`cargo test`, `cargo clippy --tests`, `cargo fmt -- --check`, plus any `just fix -p ` you relied on). CI failures that could have been caught locally slow down the process.
- Make sure your branch is up-to-date with `main` and that you have resolved merge conflicts.
- Mark the PR as **Ready for review** only when you believe it is in a mergeable state.
### Review process
1. One maintainer will be assigned as a primary reviewer.
2. We may ask for changes - please do not take this personally. We value the work, we just also value consistency and long-term maintainability.
3. When there is consensus that the PR meets the bar, a maintainer will squash-and-merge.
### Community values
- **Be kind and inclusive.** Treat others with respect; we follow the [Contributor Covenant](https://www.contributor-covenant.org/).
- **Assume good intent.** Written communication is hard - err on the side of generosity.
- **Teach & learn.** If you spot something confusing, open an issue or PR with improvements.
### Getting help
If you run into problems setting up the project, would like feedback on an idea, or just want to say _hi_ - please open a Discussion or jump into the relevant issue. We are happy to help.
Together we can make Codex CLI an incredible tool. **Happy hacking!** :rocket:
### Contributor license agreement (CLA)
All contributors **must** accept the CLA. The process is lightweight:
1. Open your pull request.
2. Paste the following comment (or reply `recheck` if you've signed before):
```text
I have read the CLA Document and I hereby sign the CLA
```
3. The CLA-Assistant bot records your signature in the repo and marks the status check as passed.
No special Git commands, email attachments, or commit footers required.
#### Quick fixes
| Scenario | Command |
| ----------------- | ------------------------------------------------ |
| Amend last commit | `git commit --amend -s --no-edit && git push -f` |
The **DCO check** blocks merges until every commit in the PR carries the footer (with squash this is just the one).
### Releasing `codex`
To stage npm artifacts for a release, run the helper from the repo root:
```bash
./scripts/stage_npm_packages.py \
--release-version 0.6.0 \
--package codex
```
The script assembles native binaries, hydrates the `vendor/` tree, and writes tarballs to `dist/npm/`. Inspect the generated package contents (for example by extracting them or running `npm pack --dry-run`). When satisfied:
```bash
cd dist/npm
npm publish codex-0.6.0.tgz
```
Add additional `--package` flags if you need to ship the responses proxy or SDK in the same release. See [`codex-cli/scripts/README.md`](./scripts/README.md) for details and troubleshooting tips.
### Alternative build options
#### Nix flake development
Prerequisite: Nix >= 2.4 with flakes enabled (`experimental-features = nix-command flakes` in `~/.config/nix/nix.conf`).
Enter a Nix development shell:
```bash
# Use either one of the commands according to which implementation you want to work with
nix develop .#codex-cli # For entering codex-cli specific shell
nix develop .#codex-rs # For entering codex-rs specific shell
```
This shell includes Node.js, installs dependencies, builds the CLI, and provides a `codex` command alias.
Build and run the CLI directly:
```bash
# Use either one of the commands according to which implementation you want to work with
nix build .#codex-cli # For building codex-cli
nix build .#codex-rs # For building codex-rs
./result/bin/codex --help
```
Run the CLI via the flake app:
```bash
# Use either one of the commands according to which implementation you want to work with
nix run .#codex-cli # For running codex-cli
nix run .#codex-rs # For running codex-rs
```
Use direnv with flakes
If you have direnv installed, you can use the following `.envrc` to automatically enter the Nix shell when you `cd` into the project directory:
```bash
cd codex-rs
echo "use flake ../flake.nix#codex-cli" >> .envrc && direnv allow
cd codex-cli
echo "use flake ../flake.nix#codex-rs" >> .envrc && direnv allow
```
---
## Security & responsible AI
Have you discovered a vulnerability or have concerns about model output? Please e-mail **security@openai.com** and we will respond promptly.
---
## License
This repository is licensed under the [Apache-2.0 License](LICENSE).